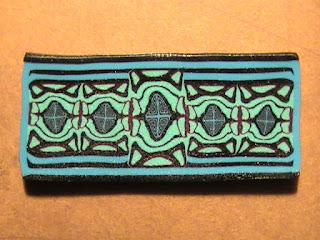
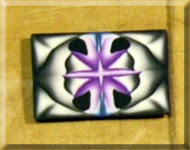
I will only ask this once...
Scroll to the bottom. Add your message -so much as an ASTERISK- so that I can move forward confidently with Canin' Able, to make it FREE, to make it SOON, and to make it a shared experience.
I can't tell how "important" my blog is. I have QUIT hosting multiple websites, at least for the time being, because well... Things just kinda' got out of hand, after 17 years in clay.
I'm not a "Marketer" But having learned a few things about "proper" marketing, I apologize for not having studied it sooner. My lack of understanding has ROBBED you, me, my family, and(in all humility) HUMANITY.
I am just plain darn SORRY.
Enough of that though.
Let's ROCK MILLEFIORE!!!!!!!!
\Best,
Wes
Friday, September 4, 2009
Tuesday, May 5, 2009
Build A "He-Man Rolling Pin"
Here is a quick help I've been meaning to share that should pay off for you almost every day. I just had to get around to making an extra one!
First and foremost(if it's not too late already!), check the borehole in the marble rolling pin AT THE STORE. The hole should be 'reasonably' centered. The face of the rolling pin should be smooth, without pitting or fault lines. They can vary greatly, so do check.
Okay...
This type of bearing, called a "freeway bearing", is commonly available and the pair will set you back roughly $4.00 - $5.00. Thankfully, these rolling pins are all basically the same, so take down these measurements, or print the picture and just show the guy at the bearing supply, farm supply, etc. You should NOT pay more than $3.00/each.

Ahhh! Back from the store so soon? he he...
See the shot further below. If the stone bit you are using is cylindrical(as opposed to cone shaped/tapered), then you may have to wear the front end of the bit off on a piece of scrap steel or something to round it off a fair amount. It will make your first 'bite' into the marble bore hole nice and easy.
***Use HIGH SPEED, and WEAR GLASSES.***

A few drops of water will keep the dust down. You may need a larger hole than the size of the bit you are grinding with, so use a rotating/tilting method. This works better than grinding side to side.

Check continually, taking care not to get wet marble muck inside your shiny new bearing when you test the fit.

When you're happy with the fit, do a final rinse and let dry thoroughly.
Swipe a thin "sealing layer" of contact cement inside the ends. This stuff
dries within moments. Let it get tacky and add some more.
Test the fit of the bearing if you must, but be sure not to get any gummy-boogers in your shiny new bearing. (Actually, if you found a rusty old pair of freeway bearings in the garage, I applaud you!)


Once you're satisfied that the bearings are seated well,
let dry for a while. Seal the flange(outer edge) of the bearing to the marble
with generous layers of cement.
let dry for a while. Seal the flange(outer edge) of the bearing to the marble
with generous layers of cement.
Okay, mine ain't the prettiest, but you get the idea!

Snug your handles in, and then back them off 1/16".

Snug your handles in, and then back them off 1/16".
WARNING:
You are going to be quite thrilled with the action of
your new He Man Rolling Pin, smooshing blocks like never before...
DON'T BREAK THE HANDLES LEANING ON IT!
(...it's REALLY hard on the knuckles!)
Cheers!
| Reactions: |
Sunday, April 5, 2009
4000 CurveBeads: Epilogue!
As usual, I had envisioned blogging far more about this job, and the processes, but well...next time I guess.
It's been fun charting out all the angles to be covered in publication, and I look forward to blogging through further projects!
I wish I could have shot the full 4000 Necklaces all in one, but we sent it out in stages, even as many were still out-of-house for assembly. So, here's what 900 or so looked like anyway!!
Thanks for the visit, and for your encouragement throughout. It WAS a monster-sized job...for this guy anyway.
Now FINALLY, BACK TO THE CANIN' ABLE PROJECT! YAY!
| Reactions: |
Subscribe to:
Posts (Atom)


